
Heirloom Inspired Dining Room
- southernrootslivin
- Jul 6, 2021
- 4 min read
Updated: Sep 5, 2021
Here we go again! This is our second fixer-upper. Our first was the home I grew up in here in The Woodlands. Those special before and after shots will be posted in due time, but for now I wanted to share with you how the dining room vision came to be. It’s so rewarding to bring a space to life and having a willing, “learn-as-you-go”, optimistic partner has made all the difference. Thanks babe! With a little imagination and a big desire to host dinner parties or Sunday brunch, we turned this ordinary under-utilized front room into a cozy wow-factor that regularly elicits giggles when I play records and dance with the girls!

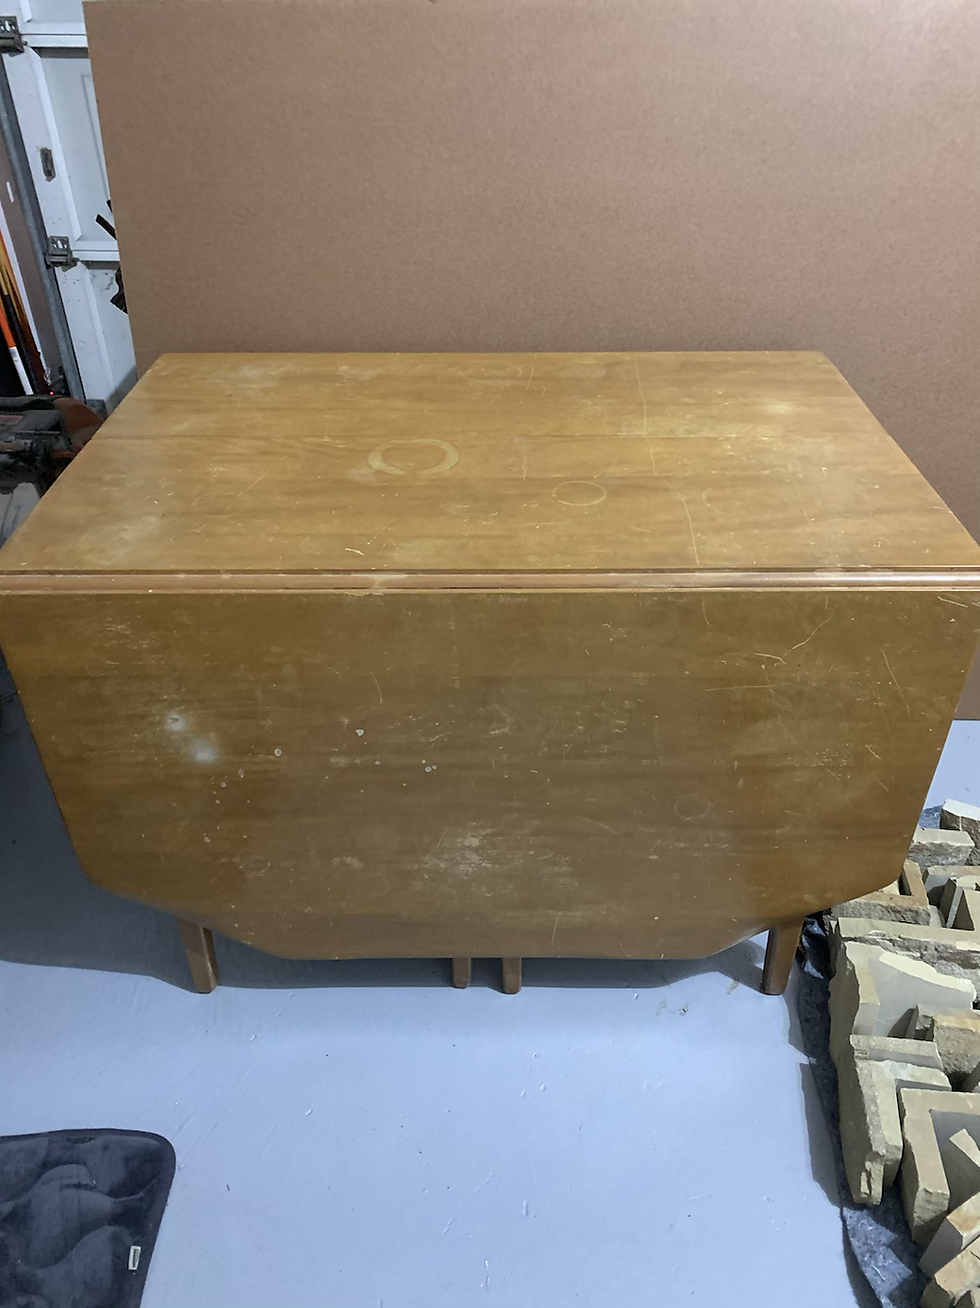
It all started with the heirloom centerpiece table which once belonged to my grandparents. These were some of the best people to roam the earth, and my youngest daughter's namesake, so this table was a must for me, and it is something I can pass along to my children. It is a Cushman Colonial built in the 1930’s, solid wood, not a single screw! Hand built and built to last. There were too many memories to count growing up with my extended family sitting around this very table playing card games and dominoes. This sentimental piece needed some love too though. After many hours sanding the maple and finishing with a Fruitwood stain, she came back to life!
We had already replaced the floors with a wide plank European white oak before moving in. (By the way picking out the right wood floors can be an amazingly humbling task….but I picked up a few tips I will share in a future post!) I still remember the crew trying to take up the old dark flooring which came up in splinters. I felt so bad, but they did an amazing job and I tipped them for their efforts.
Next...I had dreams of a dark rich jewel tone green from the very beginning for the walls. You will discover in future blog posts, I am not one to shy away from wallpaper. Originally, I was to use a deep shade of green grass cloth. I looooove grasscloth wallpaper, so timeless! And usually you can get away without skimming if your walls are only slightly textured which is a big deal. But ultimately, I opted for the less expensive, but no less impressive, paint color of Country Squire by Sherwin Williams. Don’t you just love how much depth it gives the room!

We knew we wanted to raise the chair railing and complete the wainscoting that was already around the columns. Hours of time was spent scouring the internet for a trim that matched what was already in the house. After a few purchases and returns, we found what we were looking for. Next was tackling the non-cased windows. I was glad they weren’t cased, I didn’t want to take away from the mood-altering color I had planned for the walls, nor was I wanting it to be too overly formal. If you look online for wainscoting how-tos for an example, you may notice there isn’t a lot of rooms that have it with windows, at least non-cased ones. For our DIYer I decided to bring down the trim to the window ledge and back up each time to achieve the look I wanted and sure enough…it was the right call. After all, with curtains this would not be a detail that would be scrutinized or admired.
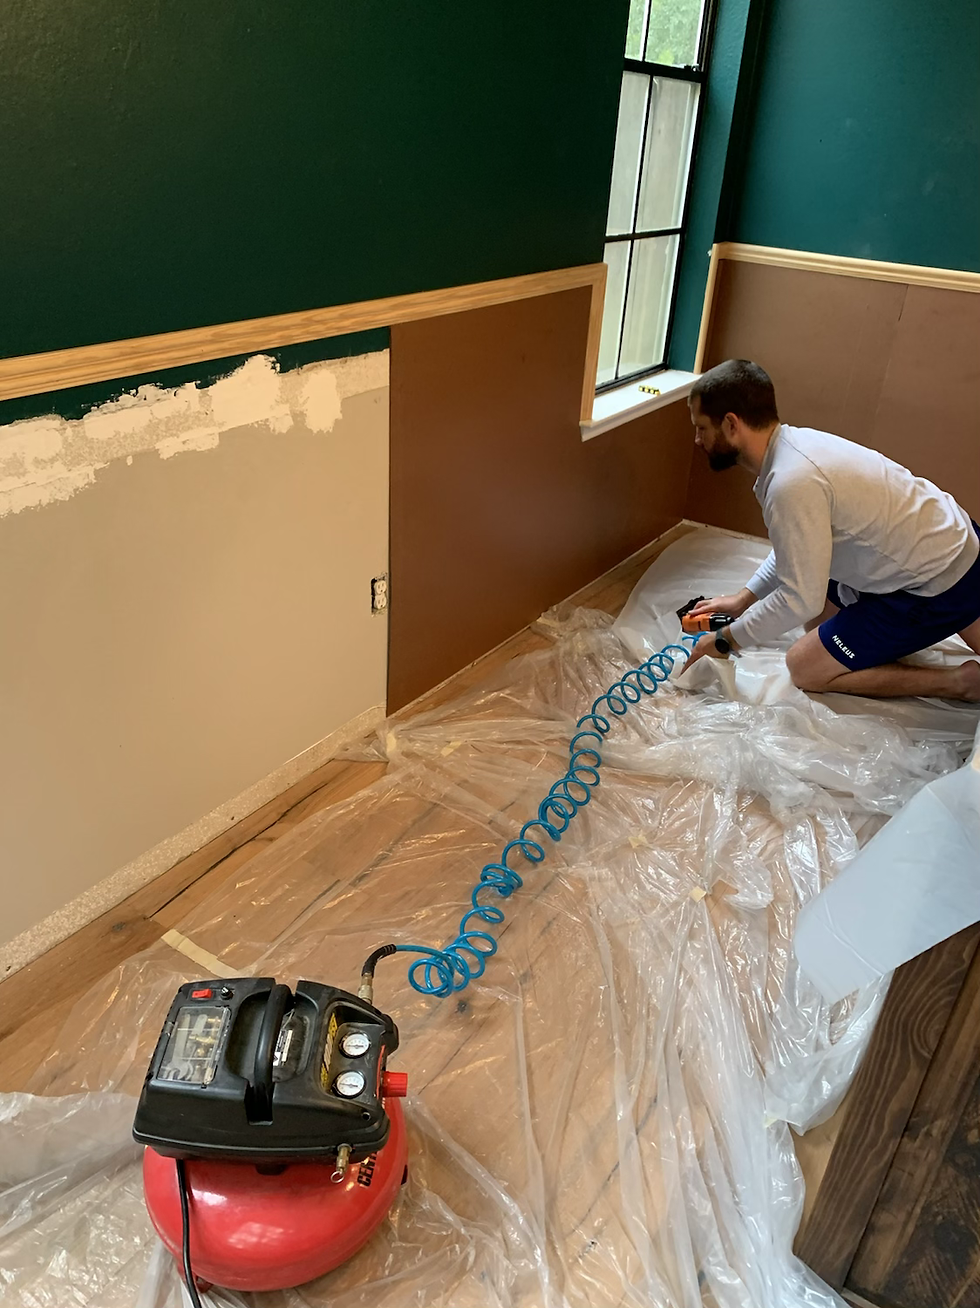
The prep for the wainscoting itself was highly involved…not just from the sourcing of the trim, but also all the math! Thankfully I like math and being able to calculate where panel breaks should be based on the trim meant less work for Kyle when blending the seams. This took a lot of sweat equity, a few special tools, a TON of cuts and delicate sawing of the paneling, putty, re-sanding, some last-minute runs to Home Depot, but well worth it in the end. And to finish it off we used our new paint sprayer for a smooth finish. I love that he’s not afraid to try his handiwork on new things. I think I will keep him!
I’m already imagining clinking a glass of wine with friends and loved ones….make it a nice Pinot Grigio. Mmmmm it does go well with the chicken! This same paint color makes an appearance again in another part of the house we will reveal in the coming weeks!

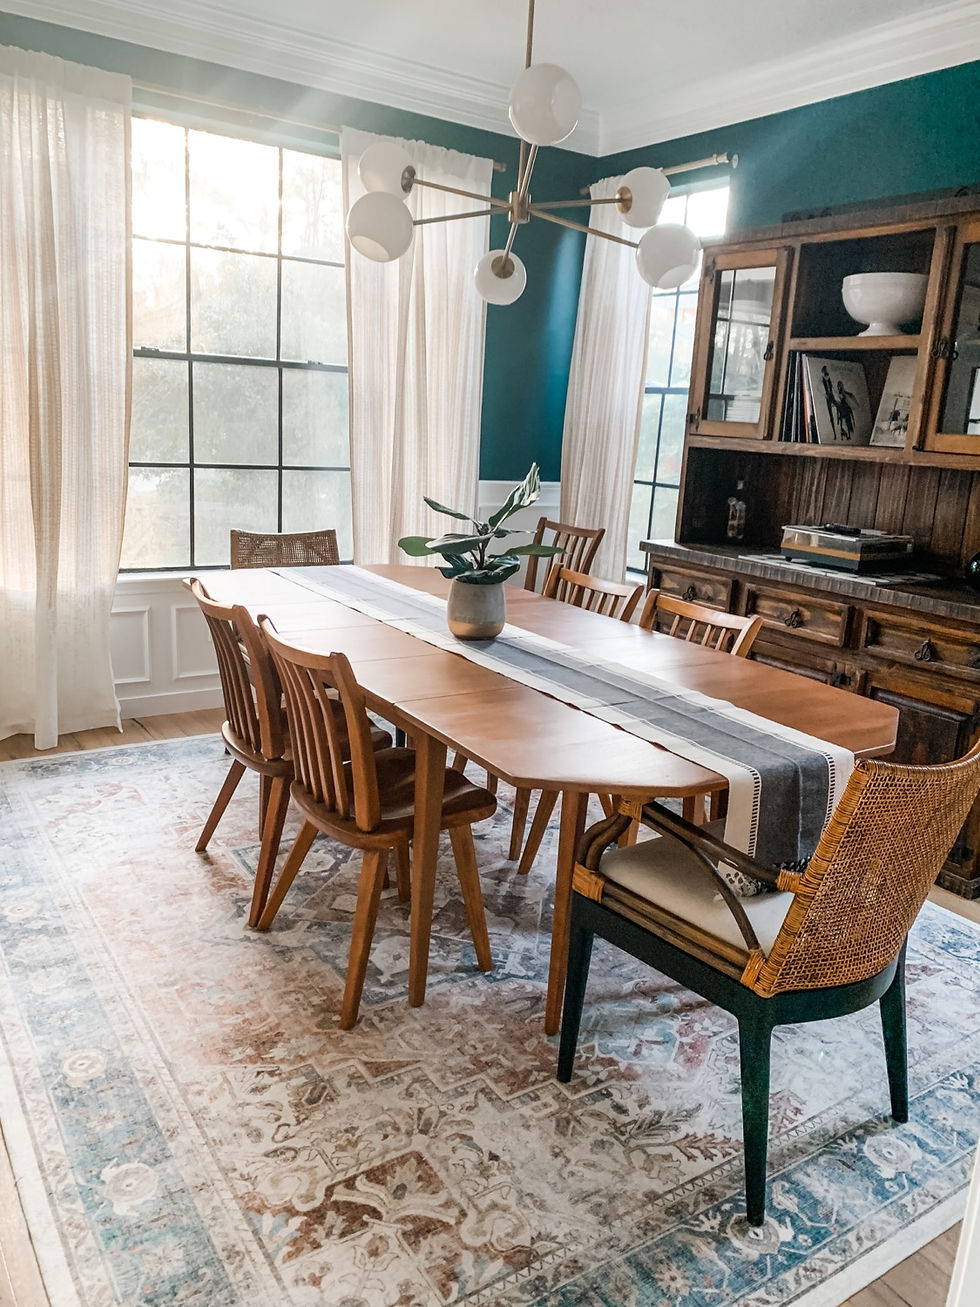
Now, with any room…I always say the lighting is like the accessory that sets the whole look off. I’m working with vintage table and chairs, a rustic buffet and hutch, a deep green that stands on its own merits, I knew I needed to offset these elements with a mid-century/modern piece of flare, and an antique brass globe Sputnik chandelier from West Elm was just the charm I needed!
We also made this style piece smart by installing a HomeKit compatible dimmer switch…so we can set the mood for any social gathering with a tap on the app, and because you can see this light from the street, it has contributed to the overall curb appeal of our home, and I love that. I will sometimes tell Siri it is “wine time” and all the lights dim and help me unwind from the stress of the day. I highly recommend this smart feature after all it’s not that expensive. In finance terms…Low cost, High yield. Much like most glasses of wine. ☺️
Next, it’s time to add in the tribal ombré gold curtains also from West Elm (I always seem to gravitate to their curtains when conducting my online search…I have since learned to start there first!) Then finally the rug, from Ruggable, because let’s be honest, food messes happen! And this one had all the beautiful colors. SOLD! With a few new woven end chairs, a turkish runner, some decor and styling…it’s a wrap! I can’t wait to have fun with table settings during the holidays! I love how each of the elements while different in style were able to come together and live in design harmony. We could all just try to replicate a picture off Pinterest, but marrying those already owned sentimental pieces with the new designer trends of today is what makes it truly unique to you and turns your house into a cozy, smart, and beautiful home.


Comments